How to create new admin user or super user in Django python

we know that Django is one of the most popular framework in python.we already discussed how to install a Djnago frame work in windows .Now we have installed Djnago framework in our system.We read Djnago provide build-in admin panel automaticaly ,so our question is what is the user name and password for admin Django,here am going to explain How to create new admin user in Django.

In Django default admin url is http://127.0.0.1:8000/admin/login/?next=/admin/,when you type http://127.0.0.1:8000/admin/login/?next=/admin/ in your browser ,you will get below User Interface

add New Admin user in Django

To Login above admin side we need admin user name and password ,see here how to create new admin user in Django

python manage.py createsuperuser

It will ask you new admin user info for your Djnago dashboard

create new admin user in Django

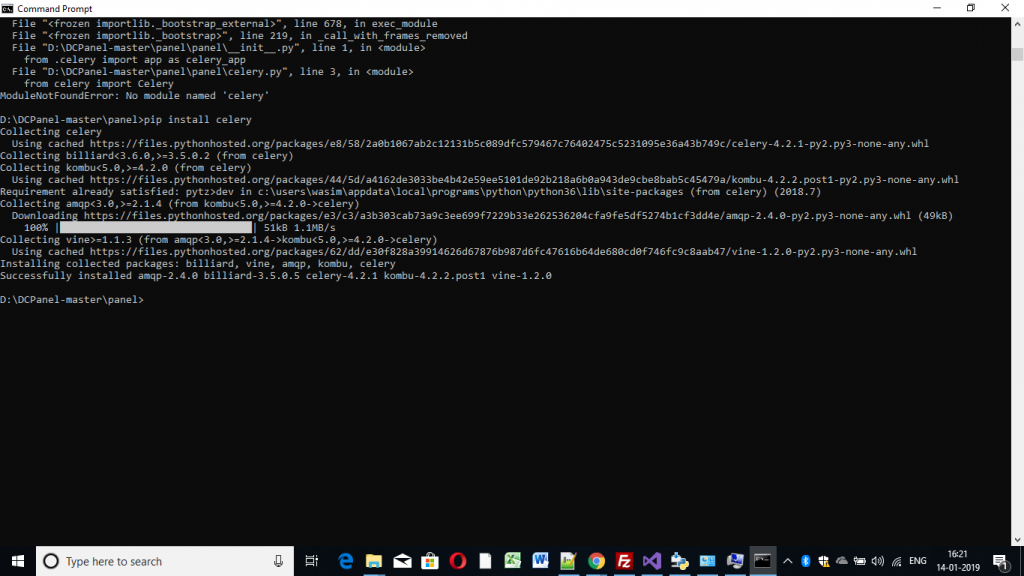
Module Not found error no module named celery in Python Django

When an running my Django python application am getting an error “Module Not found error no module named celery”. as the error says no module celery is not their in system.Since module named celery is not their with sytem we are getting an error “Module Not found error no module named celery in Python Django”.To solve this error “Module Not found error no module named celery in Python Django”, we have to install celery module in your system, to install celery we have to use PIP command.if pip is not installed with your first you to install pip after run below commands .

Install celery module in Django python

# pip install celery

Module Not found error no module named celery in Python Django

how to renew let’s encrypt ssl certificate in centos using SSH command

Nowadays hacking is so simple,with out much technical extreme anybody can access other data,so it is important to encrypt the data when it exchange between the system,fortunately we have a standard security protocol called ssl to encrypt our data,among the ssl certificate let’s encrypt certificate is most popular and it is free.We can install Let’s encrypt ssl certificate in centos with easy ssh commands,but it will expire with 3 months to renew that we have to use let’s encrypt ssl certificate centos renew commands in ssh prompt,here we are finding out solution for the question “renew let’s encrypt ssl certificate centos”.

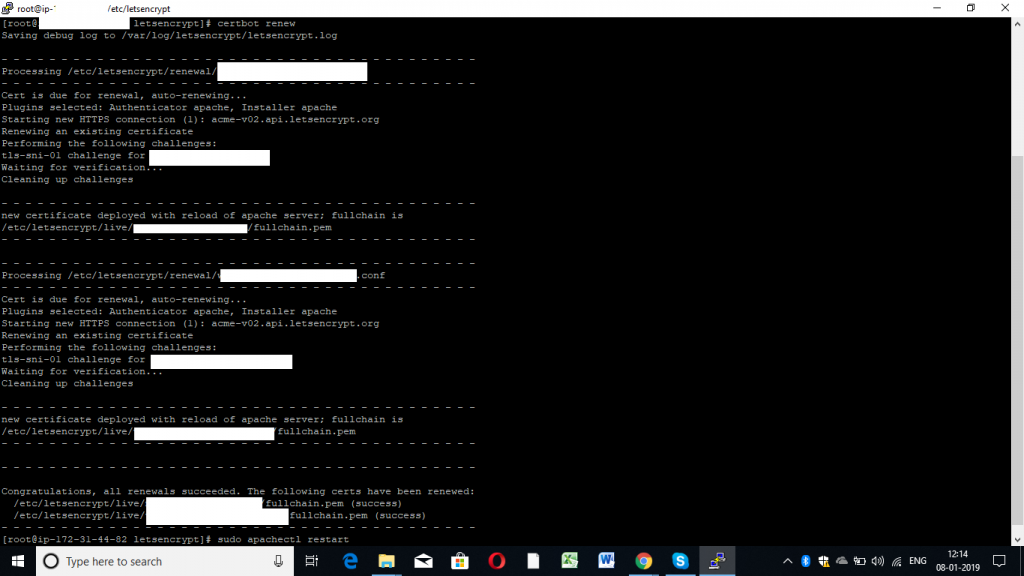
To obtain a new or tweaked let’s encrypt ssl certificate version of this certificate , simply run certbot.
To non-interactively renew *all* of your certificates, run
“certbot renew”


#certbot renew

renew let's encrypt ssl certificate centos

Install Certbot if any issue with above command please follow below steps

how to install let’s encrypt ssl certificate in centos using SSH command

How to declare a session Variable in Django Python

session is one of the key variable for programmers,it allowing to connect the website pages easily,in simple if we store session variable in one page you can access from other pages the same values.Sessions are the technique used by Django for keeping track of the “state” between the site and a browser.Here we are checking declare a session Variable in Django Python
When we are creating a project in Django,Sessions were enabled automatically inside setting.py see below

INSTALLED_APPS = [
    ...
    ...
    'django.contrib.sessions',
    ....

MIDDLEWARE = [
    ...
    ...
    'django.contrib.sessions.middleware.SessionMiddleware',
    ....

Lets see how we can assign a session variable

# Set a session value my_visite to 1
request.session['myweb_visits'] = '1'

To change session value

# if not Set it automatically declare as 0
myweb_visits= request.session.get('myweb_visits', 0)

request.session['myweb_visits'] = myweb_visits + 1

To get session value

#To Get session variable myweb_visits value
myweb_visits= request.session['myweb_visits']

To delete session myweb_visits value

# To delete session myweb_visits
del request.session['myweb_visits']

Example Code

Open urls.py files add test URL

from django.urls import path
from . import views

urlpatterns = [
    path('', views.index, name='index'),
    path('test/', views.myweb_visits, name='myweb_visits'),
]

Add myweb_visits function in view.py bottom

def myweb_visits(request):
    num_visits = request.session.get('num_visits', 0)
    request.session['num_visits'] = 1 + num_visits
	
    x = num_visits + 1

    return HttpResponse("your visitng the websites : "+ str(x))

See declare-session-variable-django-python result in below Output Images

declare-session-variable-django-python