Google is just not a search engine, it is developers god,Whenever developer as an issue ,their is always a solution with google.So handling their product like you tube, maps etc are so easy .They have their Own API ,by using this api they we can integrate easily.Here you tube providing API to get all information about your channel and fetch videos from channel.Here is the steps to integrate videos from YouTube channel in a websites.
1) Create your API key from here
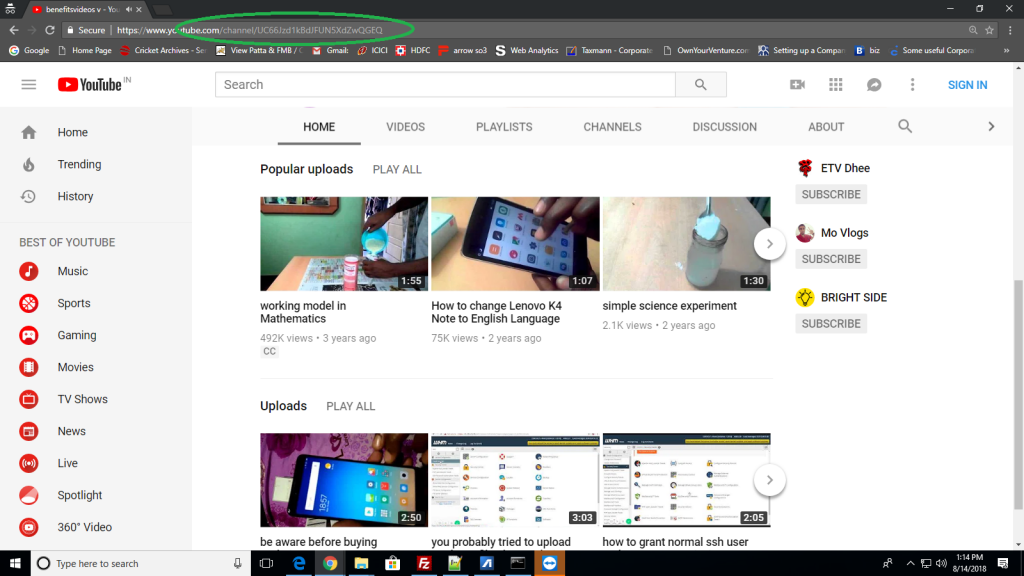
2) Get your Chanel id from your Chanel
https://www.youtube.com/channel/UC66Jzd1kBdJFUN5XdZwQGEQ
see images

3) Write a CURL function fetch data
function file_get_contents_curl_home($url) {
$ch = curl_init();

curl_setopt($ch, CURLOPT_AUTOREFERER, TRUE);
curl_setopt($ch, CURLOPT_HEADER, 0);
curl_setopt($ch, CURLOPT_RETURNTRANSFER, 1);
curl_setopt($ch, CURLOPT_URL, $url);
curl_setopt($ch, CURLOPT_FOLLOWLOCATION, TRUE);

$data = curl_exec($ch);
curl_close($ch);

return $data;
}
4) Create youtube videos fetch URL fetch URL
Replace with your key and Channel ID
$API_key = ‘*****************’;
$channelID = ‘UC66Jzd1kBdJFUN5XdZwQGEQ’;
$maxResults = 3;
$url = ‘https://www.googleapis.com/youtube/v3/search?order=date&part=snippet&channelId=’ . $channelID . ‘&maxResults=’ . $maxResults . ‘&key=’ . $API_key . ”;
$videoList = json_decode(file_get_contents_curl_home($url));
5) See full code
<pre>
 function file_get_contents_curl_home($url) {
 $ch = curl_init();

 curl_setopt($ch, CURLOPT_AUTOREFERER, TRUE);
 curl_setopt($ch, CURLOPT_HEADER, 0);
 curl_setopt($ch, CURLOPT_RETURNTRANSFER, 1);
 curl_setopt($ch, CURLOPT_URL, $url);
 curl_setopt($ch, CURLOPT_FOLLOWLOCATION, TRUE);

 $data = curl_exec($ch);
 curl_close($ch);

 return $data;
 }
 $API_key = '*****************';
 $channelID = 'UC66Jzd1kBdJFUN5XdZwQGEQ';
 $maxResults = 3;
 $url = 'https://www.googleapis.com/youtube/v3/search?order=date&part=snippet&channelId=' . $channelID . '&maxResults=' . $maxResults . '&key=' . $API_key . '';
 $videoList = json_decode(file_get_contents_curl_home($url));
 <div class="gallery-slider" >
 <!-- Swiper -->
 <div class="gallery-top">
 <div class="swiper-wrapper">
 <?php
 $key = 0;
 foreach ($videoList->items as $item) {
 ?>
 <div class="swiper-slide">
 <div class="embed-responsive embed-responsive-4by3" style="z-index:1;">
 <?php if ($key == 0) { ?>
 <iframe class="embed-responsive-item" type="text/html" width="640" height="385" data-src="https://www.youtube.com/embed/<?php echo $item->id->videoId; ?>?rel=0&autoplay=1&version=3&enablejsapi=1&playerapiid=ytplayer" allowfullscreen="true" allowscriptaccess="always"" frameborder="0" controls id="video<?php echo $key; ?>"></iframe>
 <?php } else { ?>

 <iframe class="embed-responsive-item" type="text/html" width="640" height="385" src="https://www.youtube.com/embed/<?php echo $item->id->videoId; ?>?rel=0&version=3&enablejsapi=1&playerapiid=ytplayer" allowfullscreen="true" allowscriptaccess="always"" frameborder="0" controls id="video<?php echo $key; ?>"></iframe>
 <?php } ?>
 </div><div class="play_video" ></div>
 </div>
 <?php
 $key++;
 }

 ?>
 </div>
 <!-- Add Arrows -->
 <div class="swiper-button-next swiper-button-white"></div>
 <div class="swiper-button-prev swiper-button-white"></div>
 </div>
 <div class="row no-gutters" style="display:none;">
 <div class="col-md-11">
 <div class="swiper-container gallery-thumbs">
 <div class="swiper-wrapper">
 <?php
 $key = 0;
 foreach ($videoList->items as $item) {
 ?>
 <div class="swiper-slide">
 <img src="<?php echo $item->snippet->thumbnails->default->url; ?>" class="img-fluid" alt="">
 </div>
 <?php
 }
 ?>
 </div>
 </div>

 </div>
 <div class="col-md-1">
 <div class="custom-controls">
 <button data-action="slidePrev">
 <img src="<?php echo esc_url(get_stylesheet_directory_uri()); ?>/images/icons/prev-slide.jpg" class="img-fluid" alt="slidecontrols">
 </button>
 <button data-action="slideNext">
 <img src="<?php echo esc_url(get_stylesheet_directory_uri()); ?>/images/icons/next-slide.jpg" class="img-fluid" alt="slidecontrols">
 </button>
 </div>
 </div>
 </div>
</div>

